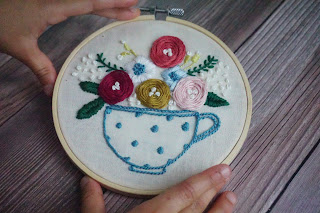
TEA CUP EMBROIDERY
Embroidery is like frosting a cake. You take a plain piece of cloth and splash it with beautiful colored floss and voila ! you got an excellent piece of art work. The only difference being that , a beautifully frosted cake never lasts forever but an embroidery, you can frame it in a hoop and hang it on your wall and it remains a thing of beauty forever!!!
MATERIALS REQUIRED
- A clean piece of cloth
- Embroidery floss
- Scissors
- needle
- 5 inch embroidery hoop
- Graphite paper
METHOD
- I found this picture on pinterest. Hand drew this picture and transferred it using graphite paper.
- Here is the list of stitches:I have used all the 6 strands of the embroidery floss for each embroidery.It gives a embossed look for the embroidery.
- Cup outline - stem stitch
- Polka Dots - Satin stitch
- Round flowers - Woven Wheel stitch
- Petal flowers(in-between the round flowers) - Satin Stitch
- Center of the flowers - French Knots
- Leaves - Fishbone stitch
- Stems - stem stitch and straight stitch for leaves form the stems
- Buds - satin stitch and French knot at the ends
- Fillings - French knots.
- This is the finished work before framing.I have practised a lot of french knots on the side of the cloth.
- Frame it in an embroidery hoop. I have used 5 inch embroidery hoop. Click here for a picture tutorial on framing the embroidery in an embroidery hoop.


Comments